fullseye
xg_crop_contours — 2D xldgeom op
- データ種:
contour→contour - 呼び出し:
fullseye.apply(img, "xg_crop_contours", a=0.5, b=0.5)(2-D は 1 画像 + 2 スカラつまみa,b∈[0,1]のモデル)
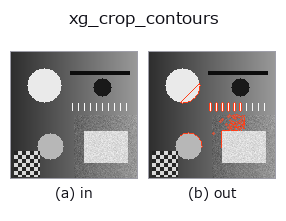
図は合成の入力 128×128 で実際に走らせた出力。左が入力、右が出力。点群は上から見た散布(明るさ = z)、1-D 列は折れ線、体積は z 方向の最大値投影、動画は中央フレーム、複素画像は振幅、絵にならない返り値は値そのもの。
つまみ a を振る(0.1 / 0.5 / 0.9、もう一方は既定):
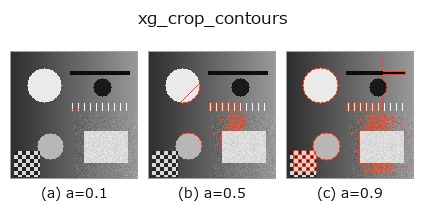
つまみ b は出力を変えない(実測: 0.1 / 0.5 / 0.9 で同一)。
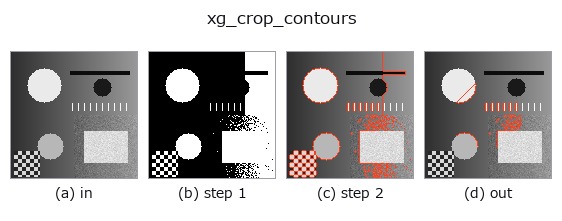
段階(前置きの op → この op。左から順):
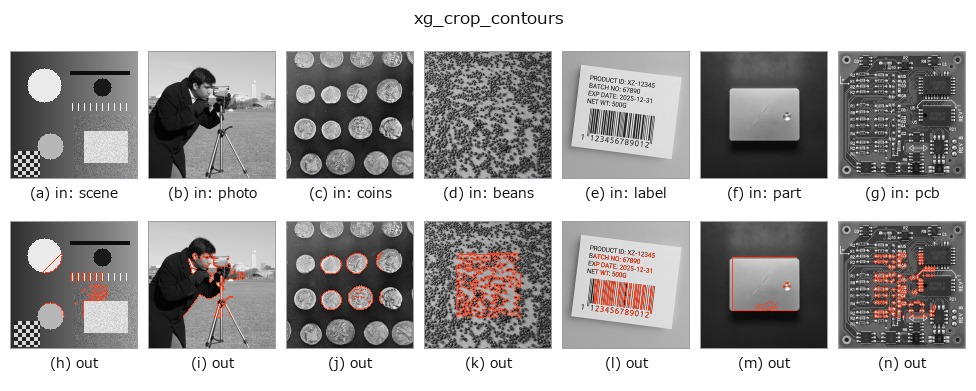
別の画像でも(合成シーン / 写真 / 硬貨。上段が入力、下段がその出力。つまみは既定):
使い方
Keep only contour points inside the central a-fraction window of the shape.
画像中心に置いた、高さ a*H、幅 a*W の矩形窓の内側にある輪郭点だけを
残す(a は [0,1] に clip、b は未使用)。窓は行 [(0.5-a/2)H, (0.5+a/2)H]、
列 [(0.5-a/2)W, (0.5+a/2)W] の閉区間。H, W は辞書の shape から取り、
無ければ全点の最大座標+1 で代用する。
返り値は {"shape": (H, W), "cs": [...]}。窓内に 1 点も残らない輪郭は捨て、
a=0 では中心線上に正確に乗る点しか残らないためほぼ空、a=1 で全点が
残る。
注意: 窓に切られた輪郭は分割されない。残った点をそのまま 1 本の折れ線として
繋ぐので、輪郭が窓を出入りするたびに「窓の縁を飛び越える辺」が生まれ、
xg_area_center の面積や折れ線長が実際より大きく出る。切り口を正しく
扱いたいなら、領域の段階で r3_clip_region を掛けてから輪郭を取り直す。
座標は (row, col)。長さで輪郭ごと選別するのは xg_clip_contours。
詳しい使い方ガイド
参考(サンプルデータ・文献)
- サンプルデータ カタログ(DL URL / ライセンス) — 2-D は skimage.data(BSD/public)+ 合成、3-D は実データ源(Stanford/PDS 等)の DL URL。
- 演算子の来歴・参考文献 — この op 族の元になった研究/手法の出典。
- アルゴリズムの正典(著者・年)と用途は上記ファミリ使い方ガイドに記載。
Studio で試す
下のプログラムは実際に走ることを確かめてある(図と同じ入力)。Studio のヘルプではこのブロックがボタンになり、その場で読み込んで実行できる。
threshold 0.50 0.50
sk_find_contours 0.50 0.50
xg_crop_contours 0.50 0.50
実行できる例(この op を実際に呼ぶ検証済みサンプル)
- gallery2d_geometry —
py -3.11 examples/gallery2d_geometry.py
型が繋がる次の op(contour を入力に取れる)
identity · select_contours · smooth_contours · fit_line_contours · contours_to_region · count_contours · total_length · select_contours_xld
同カテゴリ(xldgeom)
xg_moments · xg_area_center · xg_eccentricity · xg_orientation · xg_elliptic_axis · xg_height_width_ratio · xg_regress_contours · xg_clip_contours
Provenance: ops.py — 2D operator registry. この per-op ノートは tools/opdocs.py md が自動生成(手編集しない)。
© 2026 Kazufumi Furuse — Fullseye operator documentation. Licensed under Apache-2.0.